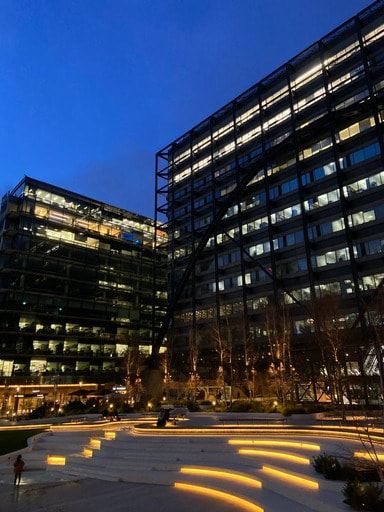
Hidden City
William Eckersly
He is a freelance photographer with over 10 years commercial experience shooting architecture and interiors. Alongside this, He's completed numerous personal projects that also encompass portraiture, landscapes and conceptual modes of photography. This work has been seen in various exhibitions, magazines, websites, and self-published books, as well as the collections of Sir Elton John and the Museum of London. He's a graduate of Westminster University’s Photographic Studies MA, and is based in London.


|
|
First attempt |
|


|
|
|
|
|
|
|
|
|
|
Second attempt |
|


|
|
|
|
|
|
|
|

Photograms
What is a Photogram?
A photogram is a photographic image made without a camera by placing objects directly onto the surface of a light-sensitive material such as photographic paper and then exposing it to light.
The usual result is a negative shadow image that shows variations in tone that depends upon the transparency of the objects used. Areas of the paper that have received no light appear white; those exposed for a shorter time or through transparent or semi-transparent objects appear grey, while fully-exposed areas are black in the final print.
The usual result is a negative shadow image that shows variations in tone that depends upon the transparency of the objects used. Areas of the paper that have received no light appear white; those exposed for a shorter time or through transparent or semi-transparent objects appear grey, while fully-exposed areas are black in the final print.
The Dark Room
A darkroom is used to process photographic paper/film, make prints and carry out other associated tasks. It is a room that can be made completely dark to allow the processing of light-sensitive photographic materials, including film and photographic paper. Various equipment is used in the darkroom, including an enlarger, baths containing chemicals, and running water.


Processes and photogram prints
Normal photograms
|
the first technique learned is how to make the average photogram with no adaptations. The first step is to select interesting items to be transposed onto the photogram. Next is to get a special type of paper called photogram paper with a special chemical which has an interesting property when reaction to white light any of the paper becomes brighter - the longer the paper is exposed the whiter the finished out come will be. After that I set up my objects on the paper sitting atop the enlarger. Next I flicked on the filter on the enlarger which is a red plastic that will only let out red light so the photo wont start to react with white light yet, this process allows me to see if my paper is in view of the light for when I take off the filter. Next I set up my timer to 2 seconds which will automatically turn of the light when the time runs out so I don't accidentally leave the paper under the light for too long leaving it to exposed and leave not contrast after developing. Finally at this stage I then take the filter off, this important to take off in the last step so I didn't previously accidentally turn on the light pre maturely and ruin the paper. Next I turn on the light and trust the timer to switch it off after 2 seconds, leaving the paper enough time to gather light without over exposing it. Right after that I dunk it into the basin of developing liquid. This develops the colours and brings out the shapes. However I don't leave it in there for long as the longer it stays in there the darker it gets. To follow this step I take the paper out with tongues as the chemicals in all the basins are an irritant to skin and bleach clothes. I then put it in the stop basin. This stops all development. I leave it in there to completely halt the process of development and confirm the image onto the paper. Finally i place it in the third basin which stops all reactions. This one requires low time to be in and then I rinse the paper off to get all the chemicals off. After that i want to dry the paper. There are several methods one of which is to hang up the paper by clip onto a string and let it air dry. However with limiting time I also have a heat machine that rolls your paper through it and leaves it with a completely dry and complete image.
|

|
Sandwich prints
|
The sandwich print is a technique used to adapt the original photogram. This method involves firstly completing all the steps in a normal photogram seen above. Once all steps have been carried out then you grab a new separate photogram paper and place it facing it photographic side to the top. Next, you place your already made photogram with the image faced down on the photogram paper below - so the two sides are touching. Following that, you then place a large clean flat glass on top of both the photograms to flatten them down so they are flush together to get the best result possible. Subsequently you then turn the safety lens on on the enlarger to line up the light with the pictures below. then you remove the filter and turn the light timer on for 1.5 - 2 seconds long. Finally you through the motions of developing the picture like the rest of the methods and you'll end up with an inverted colour picture.
|

|

|
|
|
---->
|
|
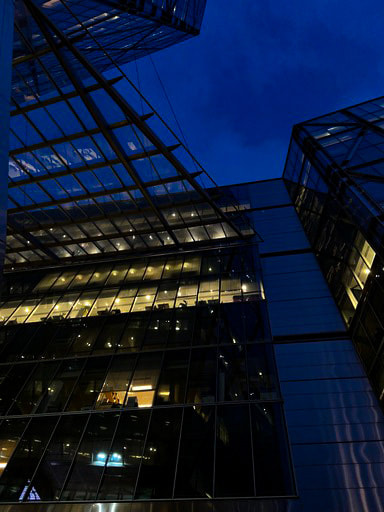
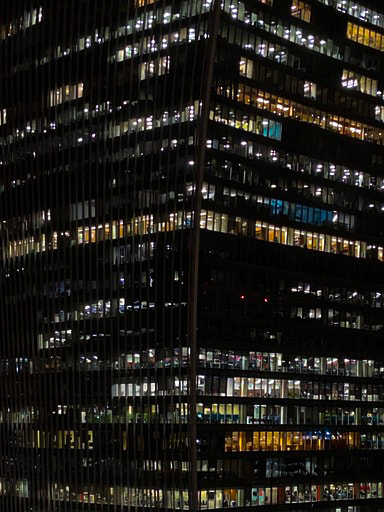
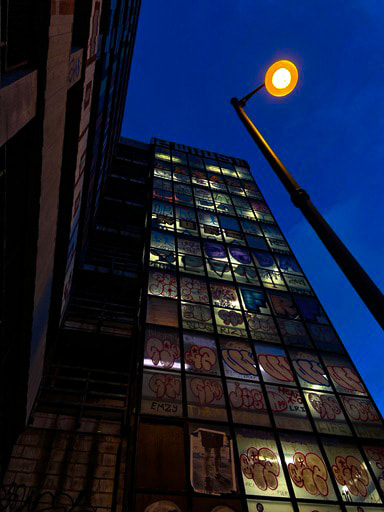
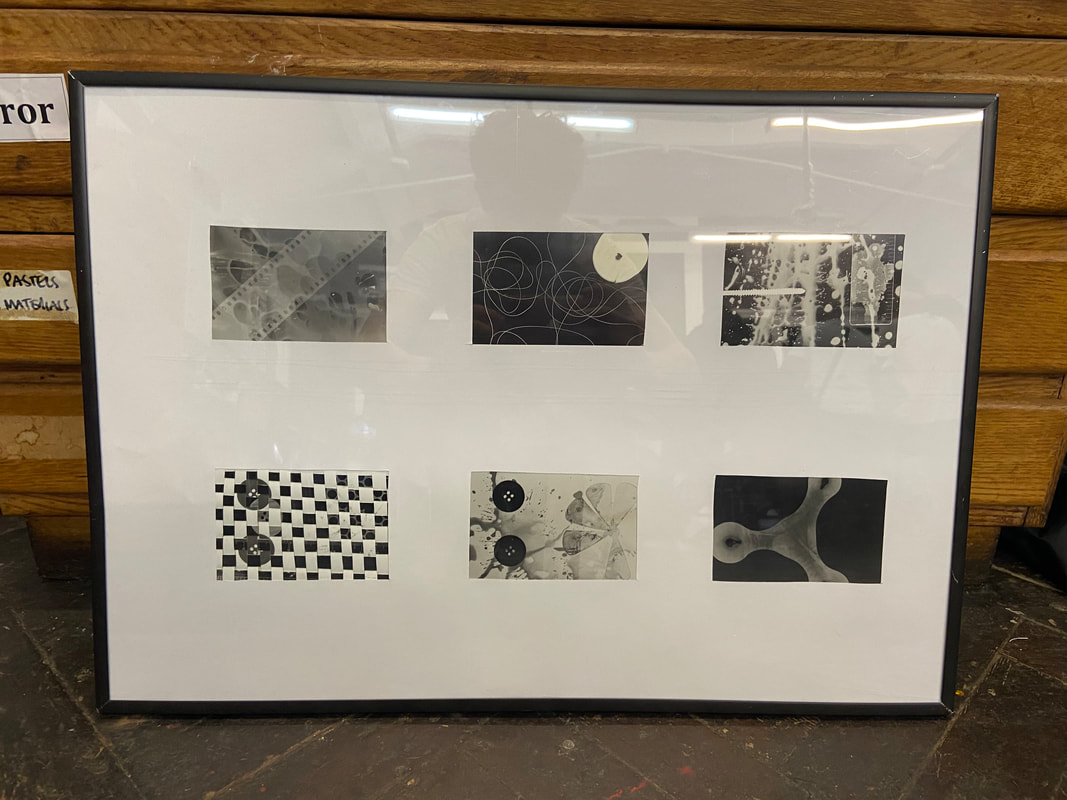
My photograms


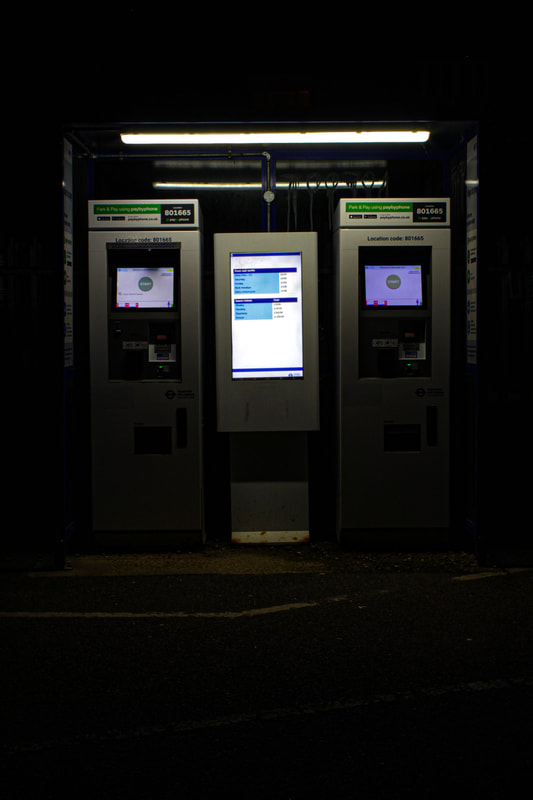
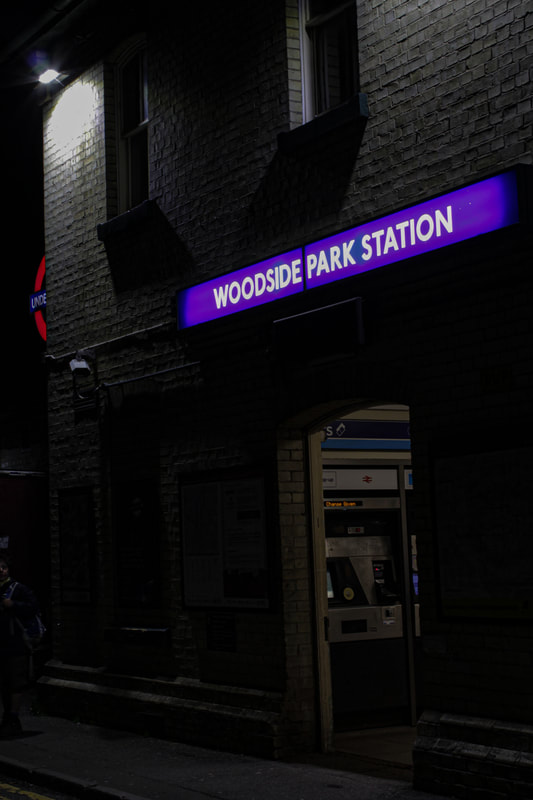
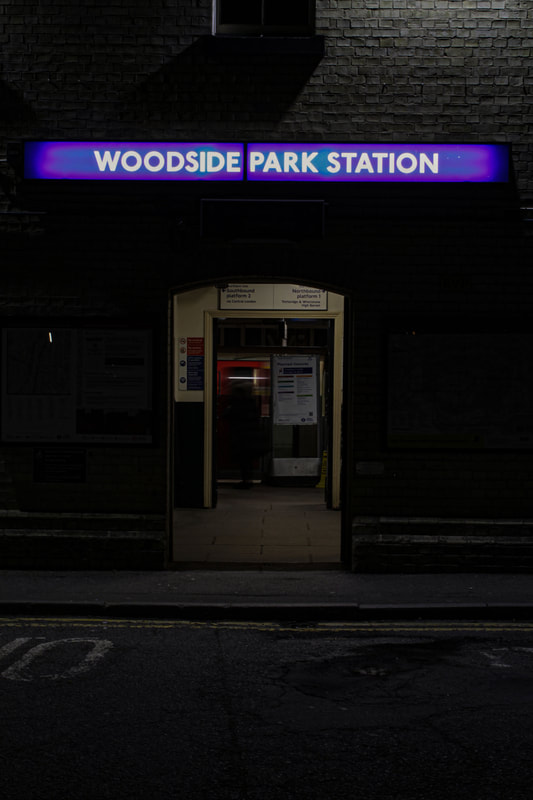
Photograms in situation

|
|

Pin Hole Camera
Ben Nathan
Ben Nathan works across different media, from painting and photography to film and sculpture. His artistic skills reflects on the functionality of the city and its industry and documenting urban change. His explorations into infrastructure and photography questions the changing nature of our cities environment and access to public or private space. His work is displayed below.


Building a pin hole camera
First thing you had to do was to get a can - finished - and ensure that there is no liquid left inside. Next you use a can opener to break apart the whole top off the can. This will then leave your camera with a large and sharp hole. Since its sharp you had to then get a high grit sandpaper and smooth out the edges to ensure when handling the can from there on out there is no risk of injury. Once this has been done you get a square, around A5 sized sheet of black paper and trace the size of the hole of the can on the centre of the sheet with a pencil. Once this had been completed you the cut several lines from the edge to the edge of the circle that was traced out. Then you place the circle on top of the whole in the can with the many pieces of hanging paper going down the can. Then start to conjoin the pieces together on the side to make a tight seal around the can and secure it with tape. Also the tape must not go onto the can as the lid has to be easily removable. Then once you've ensured there are no light leaks in the new makeshift lid on your can you can then get a needle. The needle will then poke a whole in the middle of the can and move the needle in the whole once its in there to make the whole slightly bigger. This helped when it came to taking the photos. Then get a little bit of electrical tape and fold one end and place the sticky end over the hole. This is so the folded part is easy to grab and help release the tape from the whole easily without having to try and pel its off the can.


Taking photos with the pin hole camera
|
Before taking a photo:
|
To load the camera you first go into the dark room to not expose the light sensitive paper. The you have to take off the make shift lid and put inside a light sensitive rectangular piece off paper and place it so its in line with the hole you poked in the can. and place the lid back on the can.
|
|
Window photo:
|
The fist task with the pin hole camera is to take a picture of a window with either with or without a view. This was difficult as it required you to open and close the tape over the hole very quickly as it was bright and if you didn't then you would just a get a very over exposed photo.
|
|
Corner of a building:
|
This was already more tricky then the previous task however still manageable and so when going to a corner of a building you have to ensure that you have the right angle as it is a bit of a warped picture when the image is produced. So I went closer too the building and closer to the floor to adapt my photo to have more of the building and a cooler looking angle. After several attempts of of trying to get a corner of a building finally i got a couple of good ones with good detail.
|
|
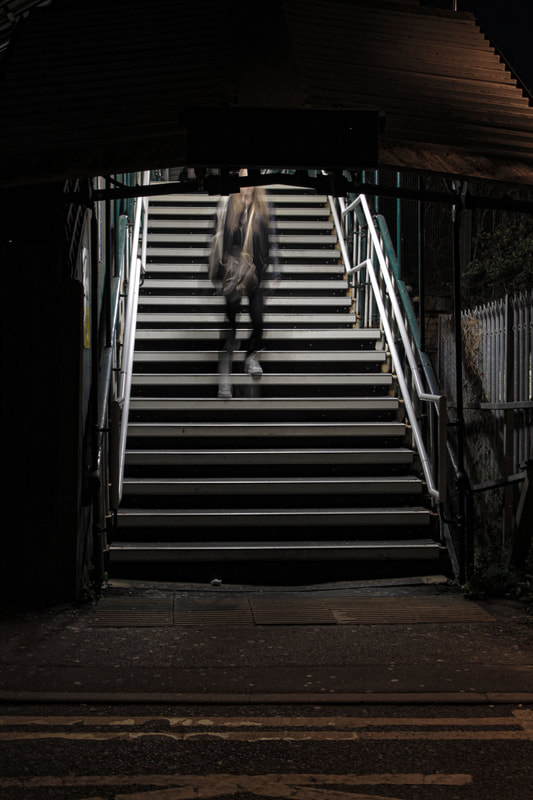
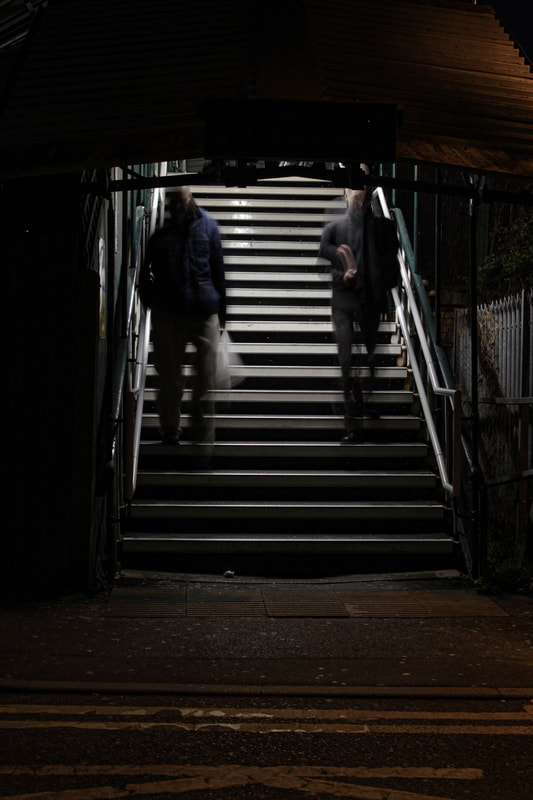
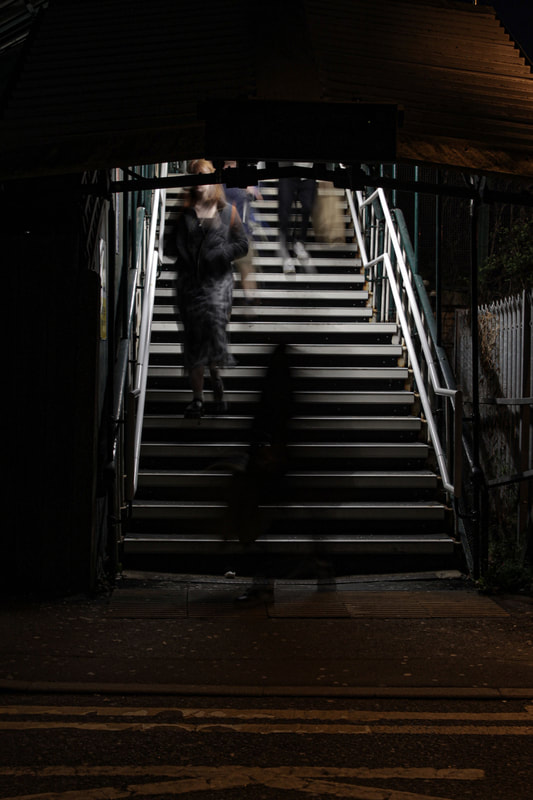
People:
|
The next task was to photograph people. These tasks increasingly got more difficult and consequently took longer and longer to fulfil and so this task was extended to take all these final shots. This task although simple in essence it was rather tricky as getting detail and lighting on the subject whilst also getting the right angle and most importantly opening the pin hole camera for the right amount of time was very tricky yo balance all theses things.
|
|
Double exposure:
|
This was by far the most difficult task. In fact I didn't even manage to complete it and I believe most of my class didn't either. To double expose is to open the camera one time then open it again with the same paper inside. However this came at a price as opening the hole for to long would over expose the paper inside so you had to be quick. I decided to photograph a wall and then a persons facial silhouette. However everytime even when changing the amounts of time I opened to the hole I never managed to get the picture right and so left this one as something to improve on as I know how I went wrong all I had to have was more time to perfect the image.
|
Developing the photos
After every attempt I would have to go all the way back to the dark room and once there and only there I can then take the lid of my can and place the exposed paper into the developing liquid and let it sit there and see if a good image was produced. Normally a nice photo came out however on several occasions the image would either just be white or just be black or not have enough detail, so I would have to do the photo again with a new piece of paper. However once I saw that a good photo was being produced I then moved it into the other basins and then dried it.
Sandwich print
Each photo always comes out inverted, so the blacks are white and the whites are black. So when I had one that I liked I would get my phone out and invert the camera to see what the actual image looks like. If I then liked that I would then sandwich print it so the image underneath would be the correct image and i would be able to add that to the final collection of good ones that I was satisfied with.

|

|
Final Photos

Film Camera
Francesca Woodman
Francesca Woodman is best known for photographing herself. But her pictures are not self-portraits in the traditional sense. She is often nude or semi-nude and usually seen half hidden or obscured – sometimes by furniture, sometimes by slow exposures that blur her figure into a ghostly presence.Born in Denver, Colorado in 1958, Francesca Woodman first started taking photographs in her early teens while at boarding school. During her short career she took over 800 pictures.
She was brought up in an environment where making and talking about art were part of everyday life. Her father was a painter and photographer and also lectured in photography at the University of Boulder in Colorado. Her mother was a ceramicist and sculptor. Artists including David Hockney and Richard Serra were often invited to stay at the Woodman’s home.
She was brought up in an environment where making and talking about art were part of everyday life. Her father was a painter and photographer and also lectured in photography at the University of Boulder in Colorado. Her mother was a ceramicist and sculptor. Artists including David Hockney and Richard Serra were often invited to stay at the Woodman’s home.


The Film Camera


The film camera has several Features. For one the lens . The lens has two primary functions; aperture and zoom. These are controlled by two different dials on the lens and has numbers in white at different intervals to record what zoom/ aperture you are on. Moreover, the lens can be replaced to fit specific needs like a special lens that has a good macro lens to get goo close ups. Furthermore, the camera has a dial at the top which configures the shutter speed gong from 2 seconds all the way to 1/1000 speed. Finally it has a space at the back for where the film will go but ill cover that later.
Loading the camera
There is a specific technique and order to load the camera. First there is a dial at the top of the camera with a lever that can be flipped up. Then you open the back of the camera with another ever on th side of the camera. Next when the backdoor is open you then get your roll and unravel a small amount. You then slot the roll on the left on the inside of the compartment and take the part that you unrolled and pull it across the inside of the compartment to the right hand side and slot it into a feeder. The concern that you may expose some of the film is low as they leave a small amount of film at the beginning for this exact reason. Finally you close the camera and the previously opened lever can then twist and start to roll the film until the winder will no longer twist. Then a lever on the right on the camera you will then move to the right and this will move the film one space over. The film number you are on is indicated on the dial next to the lever which has numbers and notches to show what picture youre on and consequently how many you have left out of 36 in a typical roll.
Taking photographs
I split the roll of 36 black and white films into two halves. Aperture and shutter speed
Types of photographs
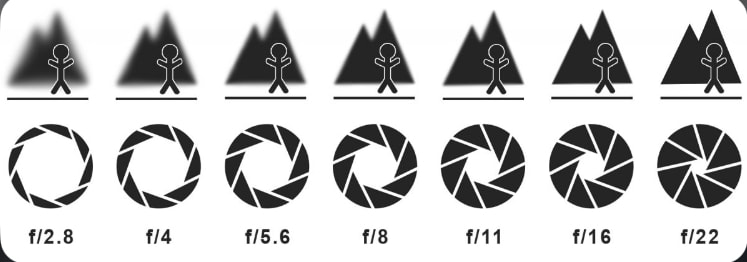
Aperture
Each photo had different apertures.
|
1 : F2
2 : F2.8 3 : F3.5 4 : F4 5 : F5 6 : F5.6 7 : F7 8 : F8 9 : F9.5 10 : F11 11 : F13.5 12 : F16 Same position -> 13 : F2 14 : F4 15 : F8 16 : F11 17 : F16 18 : F22 |
Each photo had a different aperture and so when we eventually developed the photos you could see the difference of the different apertures. The lower the number the bigger hole and consequently subjects in the foreground are going to be in focus and the background will be blurry and on the higher aperture everything - the foreground and background will be in focus and all detail will be shown.
|
Shutter Speed
|
19 : 1/1
20 : 1/2 21 : 1/4 22 : 1/8 23 : 1/15 24 : 1/30 25 : 1/60 26 : 1/125 27 : 1/250 28 : 1/500 29 : 1/1000 30 : 1/1000 31 : 1/1 32 : 1/1 33 : 1/8 34 : 1/8 35 : 1/8 |
Again the second half of the film had different levels of shutter speed in fractions. 1/1 meant one whole second and 1/1000 is one thousand of a second. This means how long the mirror infront of the lens is lifted to expose the film behind. A fast shutter speed means that you can end up getting alot of motion blur as you run the risk of moving the camera whilst the lens is open and a very quick shutter so there is barely any motion blur. However you also run tyhe risk of the picture being to dark when the shutter speed is to high as it wont let enough light in in time. The same is for the slower shutter speeds as you can end up over exposing the film and ending up with a picture too bright so you have to work around these problems.

|
Processing and Printing
This is a tedious and long process of which can be ruined at any moment. However i was successful and heres how i processed and printing my film.
Step 1 : Taking out the film
The first step of many is to first take the film out of the camera. First once you where sure you had used all the film you then wound back all the film into the canister to be able to take the film out of the camera. Once it was reeled into the canister and you are sure you then open back up the back of the camera and take the film from its compartment in the camera and now you have all the film.
Step 2 : Taking the film out of its canister
This process has to be done in absolute darkness which is one of the main challenges in this whole process as lots of steps included precise controlled movements. to take the film out of the canister you pop the bottom off the canister and the film will come out the bottom in a roll, being sure to not let the roll unroll.
Step 3 : Loading the film into the developing canister
Once the roll is out of the canister you then have to roll it into a spool which spins the film into a spiral contained in the spool and each layer and as it is spun in it is twisted through by your hands once you initially have the beginning part of the film hooked into the spool. Once it was in the spool you then put the spool into the developing canister which is air and light tight once the lid is on so the film wont be exposed before you start to develop it. This whole step was extremely difficult as it was all in complete darkness so trying to initially put the film into he spool was very diffiucult as you did it all by feel and obviously no sight. Also knowing where all the components of the devloping canister are was difficult to remember.


Step 4 : Developing the film
|
There are three stages to developing film. The first stage is the developing stage. You make a mixture of water to developer as 270:30. You pour this intro the canister and set a timer for 3 minutes and shake occasionally and once the time is up your pour out the water. The next step is the stop stage. You make a mixture of Stop and water in a 290:10. You leave this in the canister for a minute shaking occasionally until the time is up then you pour it out. The final step is the fix stage. This step you make a mixture of fix and water in a ratio of 270:30 and pour it in. You lesave tyhis in for 5 minurtes and shake occasionally. Once the timer is up you can then pour out the mixture and you are done.
|

|
Step 5 : Drying
This stage is rather simple once all the chemicals have had their run with the film you can now take it out the canister and bring it ti the light as it wont expose anymore. Now you can clip it to a wire and hang it in a drying cupboard and wait a day or so to let it dry.
Step 6 : Contact sheet test strips
Once the film is dry you can cut it up into equal sections which is 6 pictures per piece. Then you slide them into a plastic holder. Once they are all in order in the plastic holder, you can bring it to the dark room and place the film on the stage. Then you grab a small piece of developing paper and place it underneath the film - also insuring that the film is shiny side up to get a good result. Then getting a black piece of hard cardboard and setting the timer on the stage to 1 second intervals. Then you cover small patches across the film atop the paper and every time you turn on the light you move the cardboard a bit to the one side so you have a gradient of exposure on th paper below. Once the paper is developed you can then determine what the right exposure is for that strip of film. Once you have done that for all the strips then you know how much to expose each strip for.
Step 7 : Making the contact sheet
As you know what each strips' each individual exposure time under the light if the stage a bit of coordination is to take place. You place a a very large piece of paper under the whole sheet of film. And slowly start to expose different areas of the of the sheet so each area has the correct amount of exposure so you can see all the images equally. Unfortunately one of the rows never managed to fully present itself even after a minute under the light.

Step 8 : Making enlarged photos
Then pick your favourites from the contact sheet and get the corresponding film and place it on the slider in the projector atop the stage so when the light shines it shines through the film and is then projected downwards. So I put the red filter on and placed down a small sheet of paper and made a test strip like before to get the correct exposure timings. Then use that timing on the normal sheet and project the image onto an aproximately A5 sheet of paper making sure that the light is focussed and leave a boarder around the image.
And thats it, those are the steps to Processing and Printing.


